Archiving emails in Windows Live Mail 2012
This guide will help you to free up space on your PagePlay email account by saving emails to your computer rather than keeping them on the server.
This guide is only useful if you set up the email to use IMAP, where messages are stored on the server. With POP, messages are download to your computer when you check your mail and are then removed from the server.
This is for users who already access their email using Windows Live Mail 2012
1. Open Windows Live Mail 2012
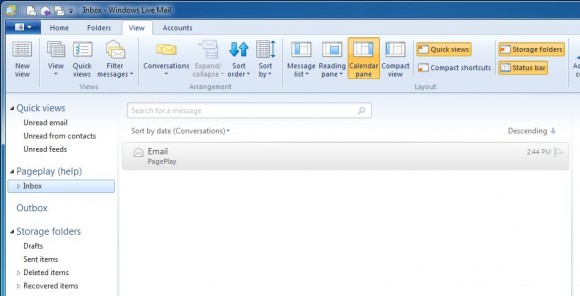
You will need Storage folders to be visible to archive your emails. If you can't see the "Storage folders" heading in the left column, click on the "View" tab at the top of the window and ensure the "Storage folders" button is pressed.
2. Create archive folder
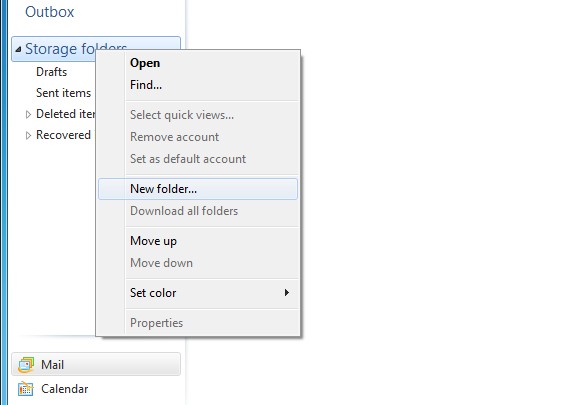
If you haven't archived your emails before, you'll need to create a local folder to archive your emails to. Right click on the "Storage folders" heading in the left column and click on "New folder..."
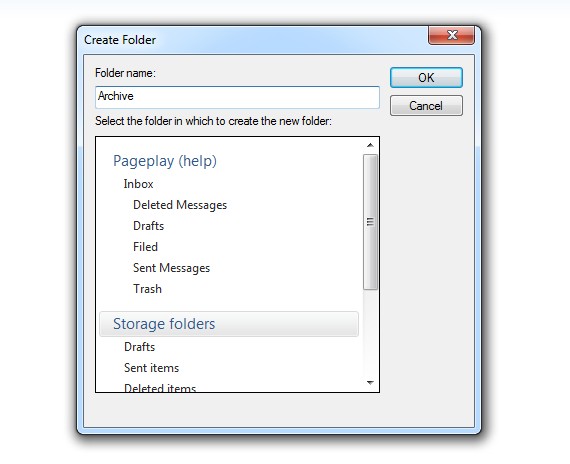
You then need to give your archive folder a name, in the example below we've given it the name "Archive" for simplicity.
Click on the "Storage folders" heading in the "Select the folder in which..." field and then click the "OK" button
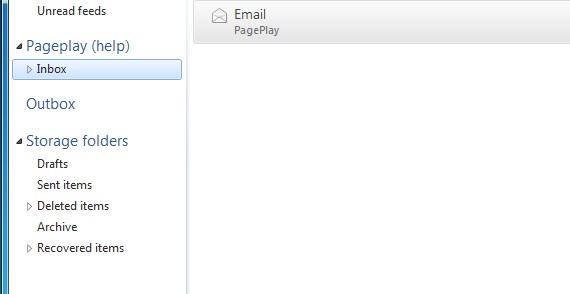
You will then see your archiving folder under the "Storage folders" heading
3. Moving emails
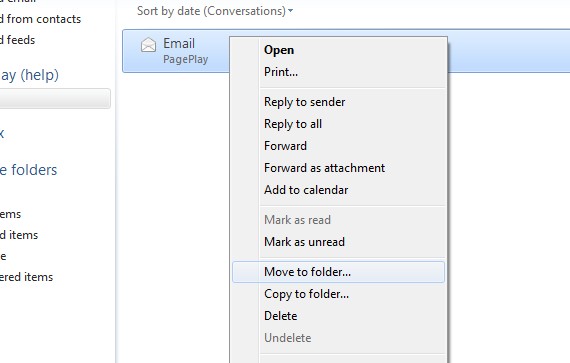
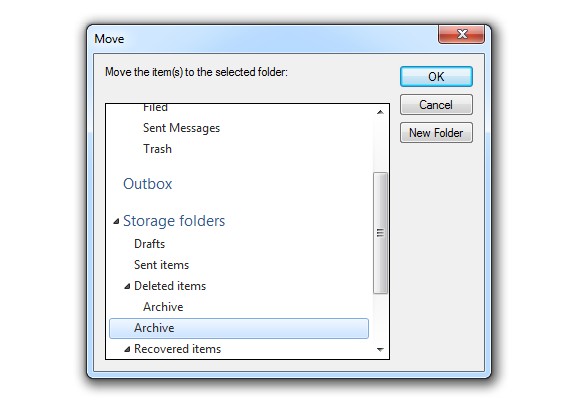
ou can now either drag and drop emails from your Inbox to your archiving folder in the left column, or you can right click on emails and choose to move them. See the example screenshot below.
Remember, you can drag and drop or choose to move multiple emails at once.
Additional...
Confirm Windows Live Mail is purging your deleted items
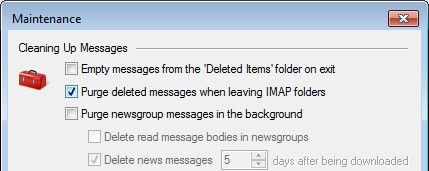
WLM will simply hide emails when you choose to delete them unless it's told to purge them periodically. Follow the steps below to ensure this option is enabled.
1. Open WLM Mail Options
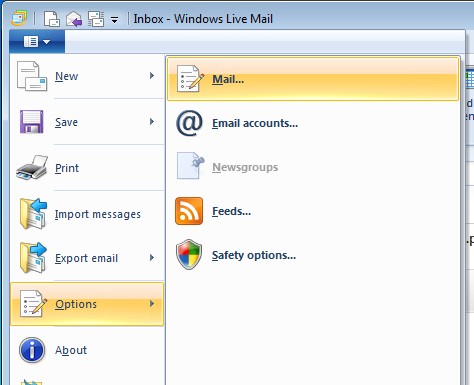
As shown in the screenshot below, click on the blue dropdown next to the "Home" tab and choose "Options" followed by "Mail..."
2. Find the "Maintenance..." button
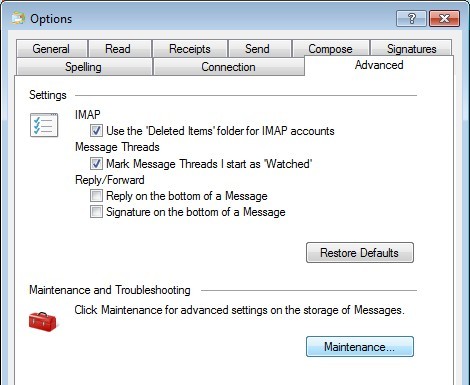
After step 1, a new window will appear. From here choose, the "Advanced" tab and then click on the "Maintenance..." button
3. Ensure settings are correct
Here we need to ensure that "Purge deleted messages when leaving IMAP folders" is checked before clicking on the "Close" button
"Apply" the settings in the "Options" window and you're done!